


-
- If you have booked a shipment, you can quickly print all your labels via the Prepare overview in MyWuunder (Shipments overview and select Prepare). Here you see all shipments that you have successfully booked and of which a shipping label is ready to print.

- You can print all (not yet printed) labels in one go via “Print pending”. We will then print all shipping labels that have not been printed by you before. You can of course also print each shipping label individually or in groups. Simply select the labels you want to print and click on “Print selected”.
- If you want to print a shipping label in even fewer steps, you can install the Wuunder 1-click Printing application on your PC. This allows you to print a label directly from a selected printer such as a Zebra (ZPL) or Dymo printer. This means that switching between the normal printer and the label printer is no longer necessary. So easy! You can install this 1-click Printing application via the Settings menu in MyWuunder. You can find more information here.
- If you connect a (Bluetooth / USB) scanner to your PC, you can even scan packing slips and printer in MyWuunder without touching the PC via scan and print.
- If you use a regular printer with sticker sheets, you will want to print 4 labels on 1 A4. In the section below “Printing 4 labels on an A4 (Mac or Windows)” we will tell you how to do this easily.
- Affix the shipping labels to the longest side of the package. read here a few more helpful tips on how to attach labels.
- We do not show return labels in the Prepare overview MyWuunder because we send it to the sender by email. If you still want to download or print return labels yourself, you can do so in the “Receiver overview”Click on the chat cloud of the return shipment and then on the link to the shipping label.
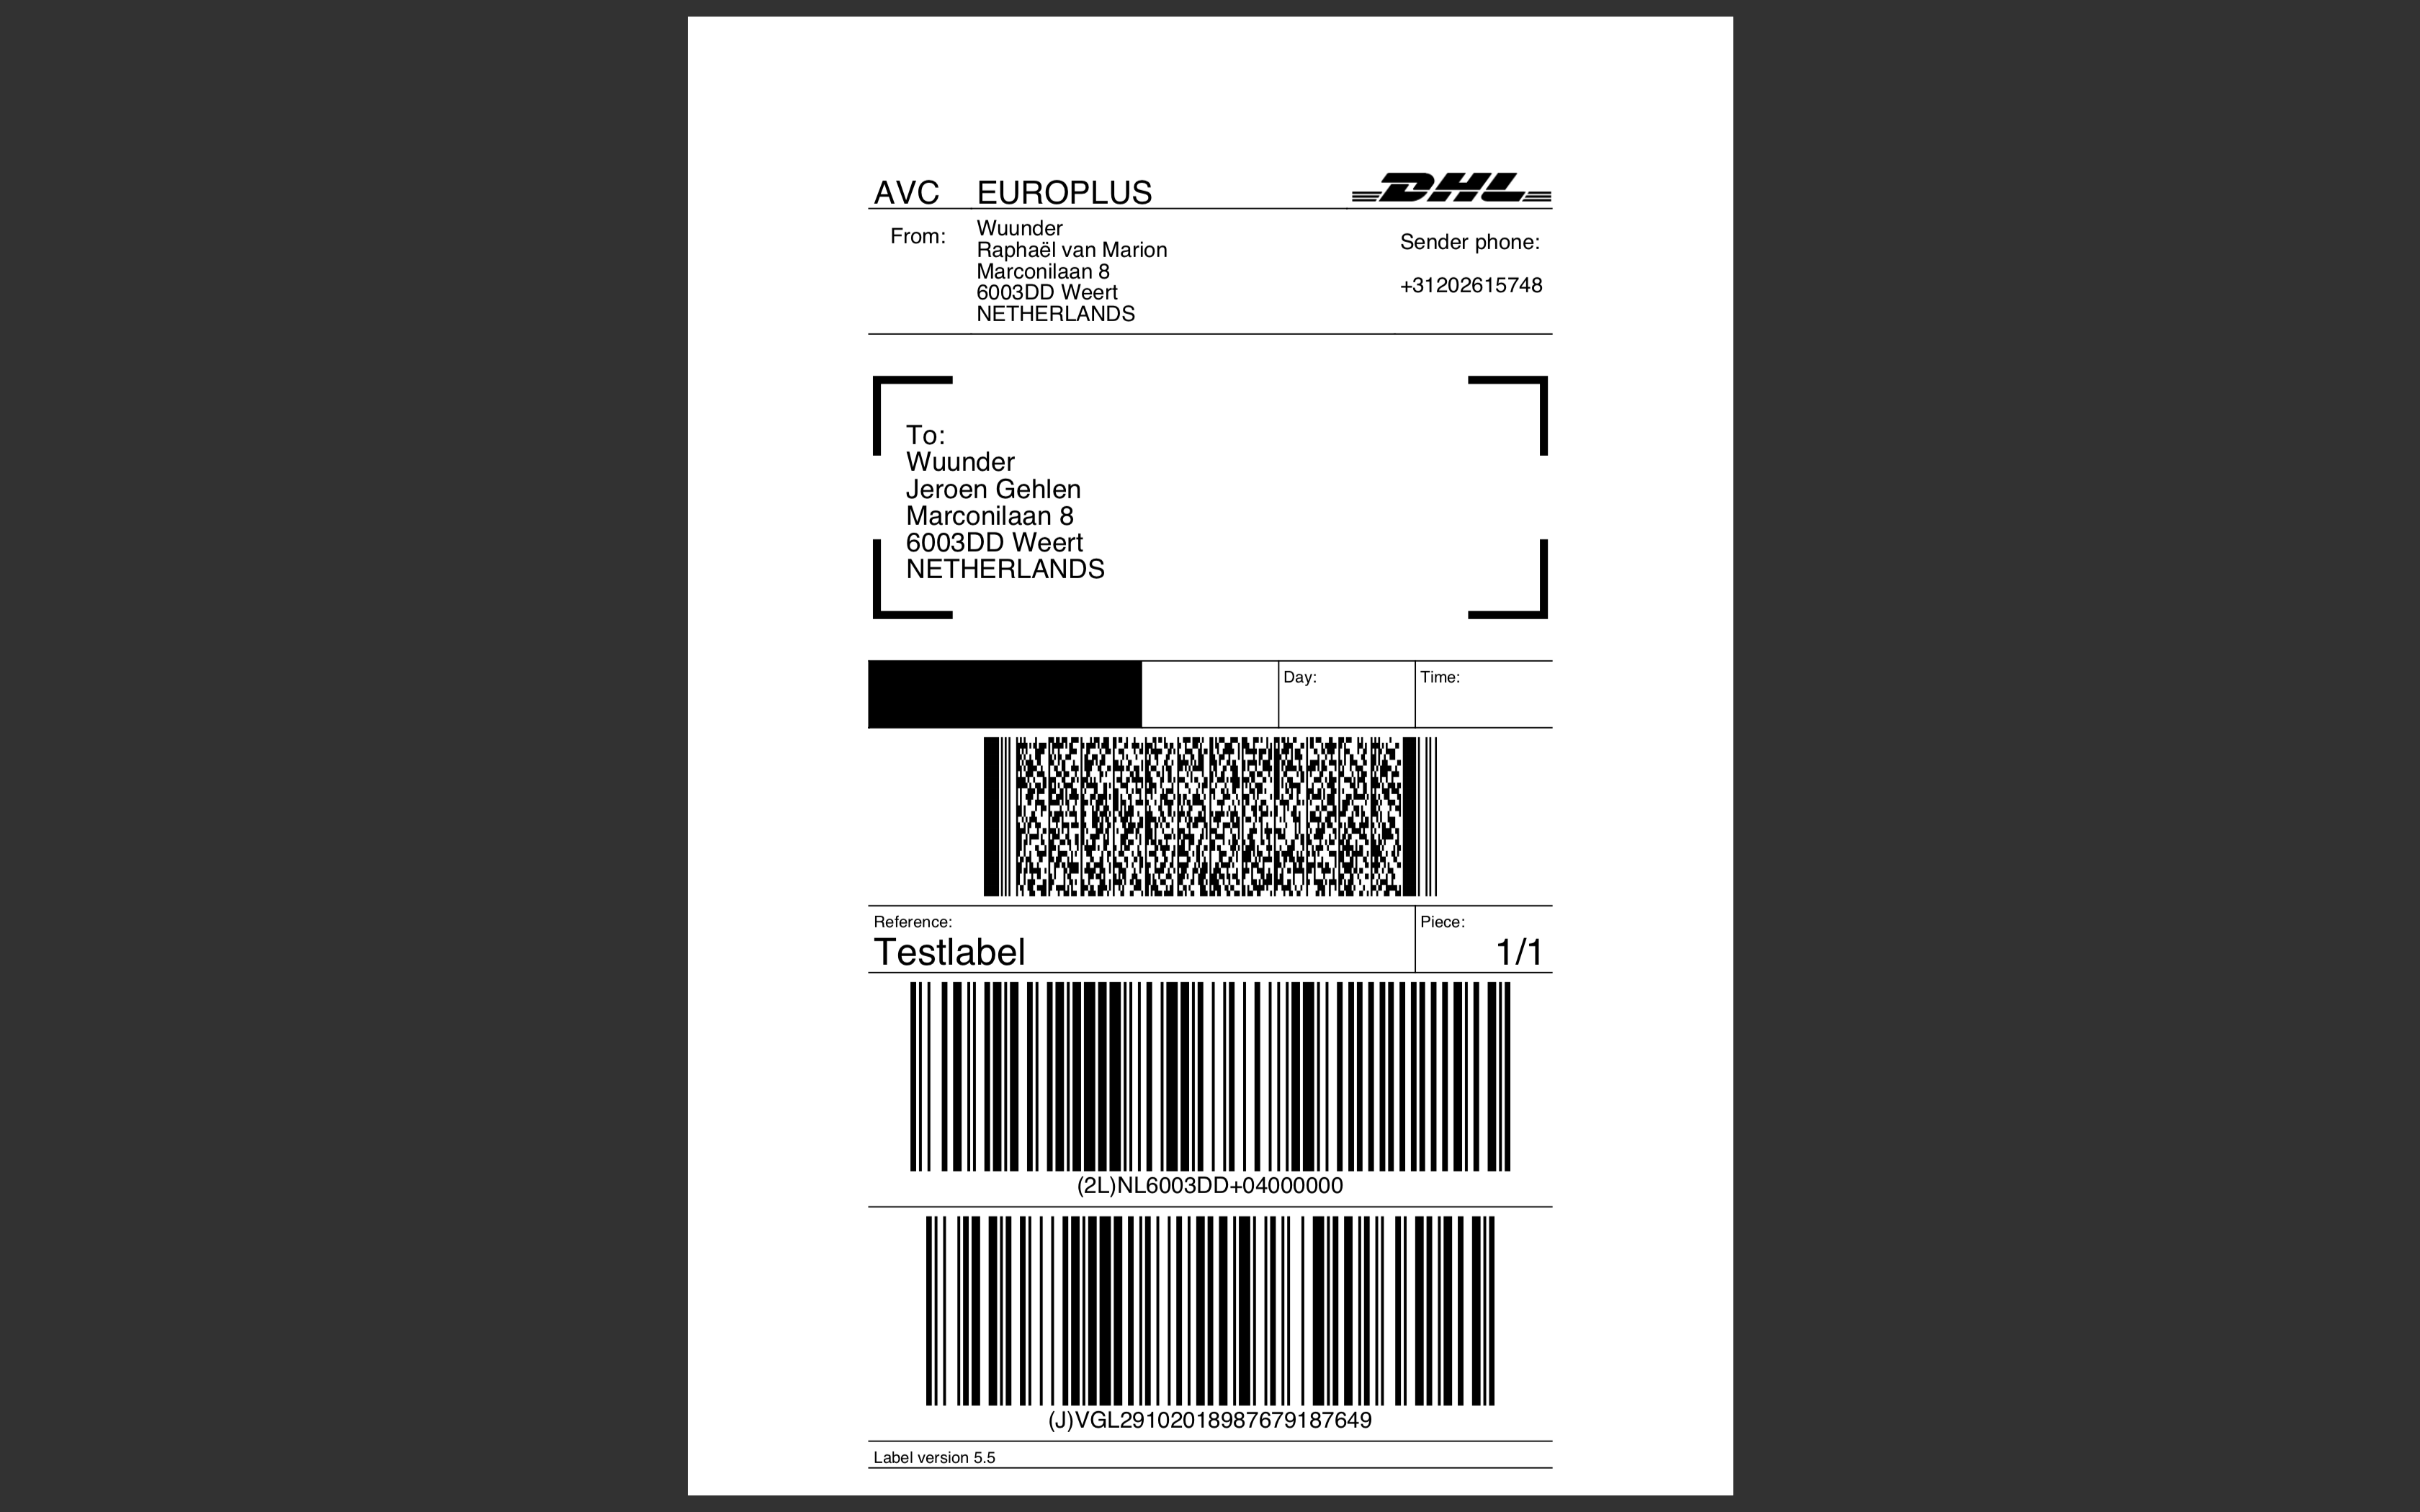
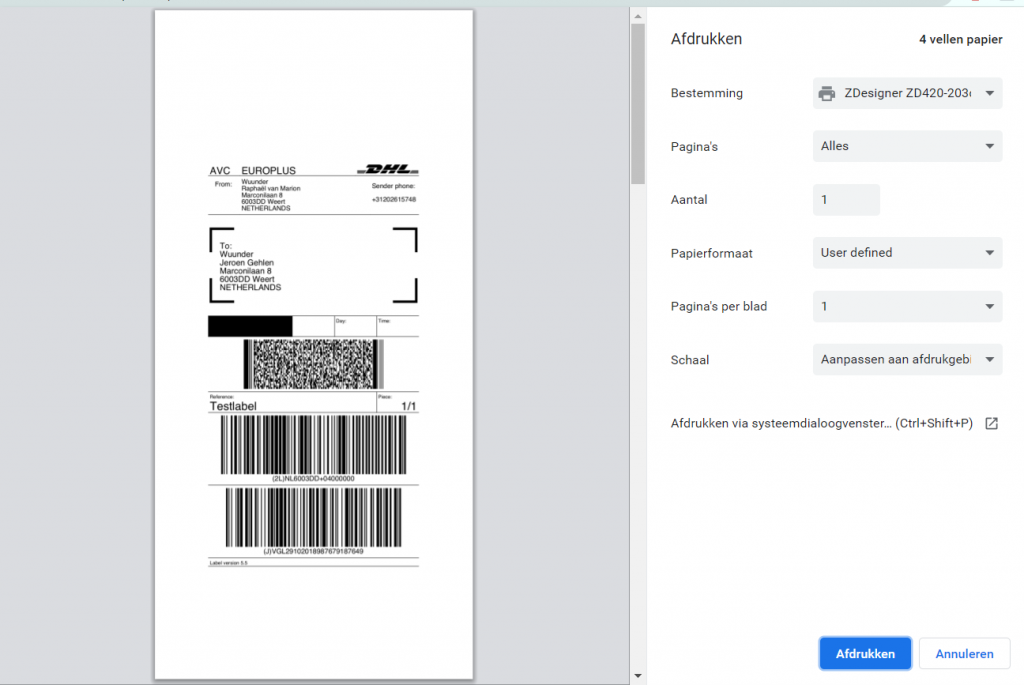
Note: Shipping labels for DHL Europlus must be larger (102 × 210 mm) than the standard shipping labels for, for example, PostNL, DPD and DHL For You.
- If you have booked a shipment, you can quickly print all your labels via the Prepare overview in MyWuunder (Shipments overview and select Prepare). Here you see all shipments that you have successfully booked and of which a shipping label is ready to print.
If you have A4 sticker sheets and you want to print 4 labels on it, that is quite easy.
-
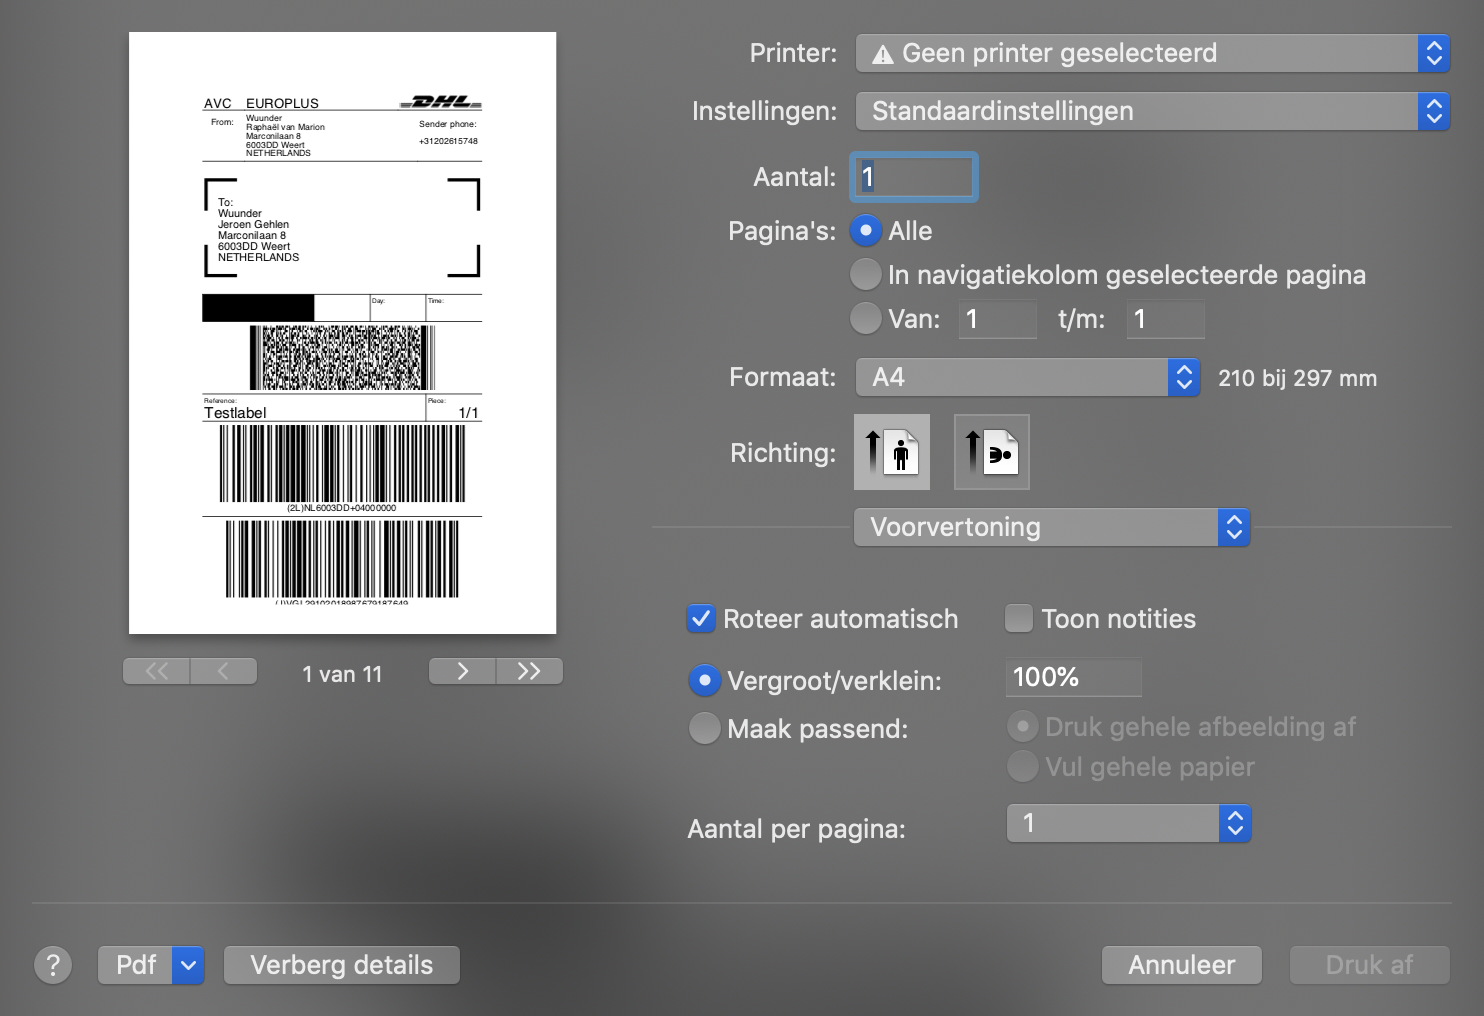
- First open the PDF file containing all labels.
- Then press COMMAND + P to access the print overview.
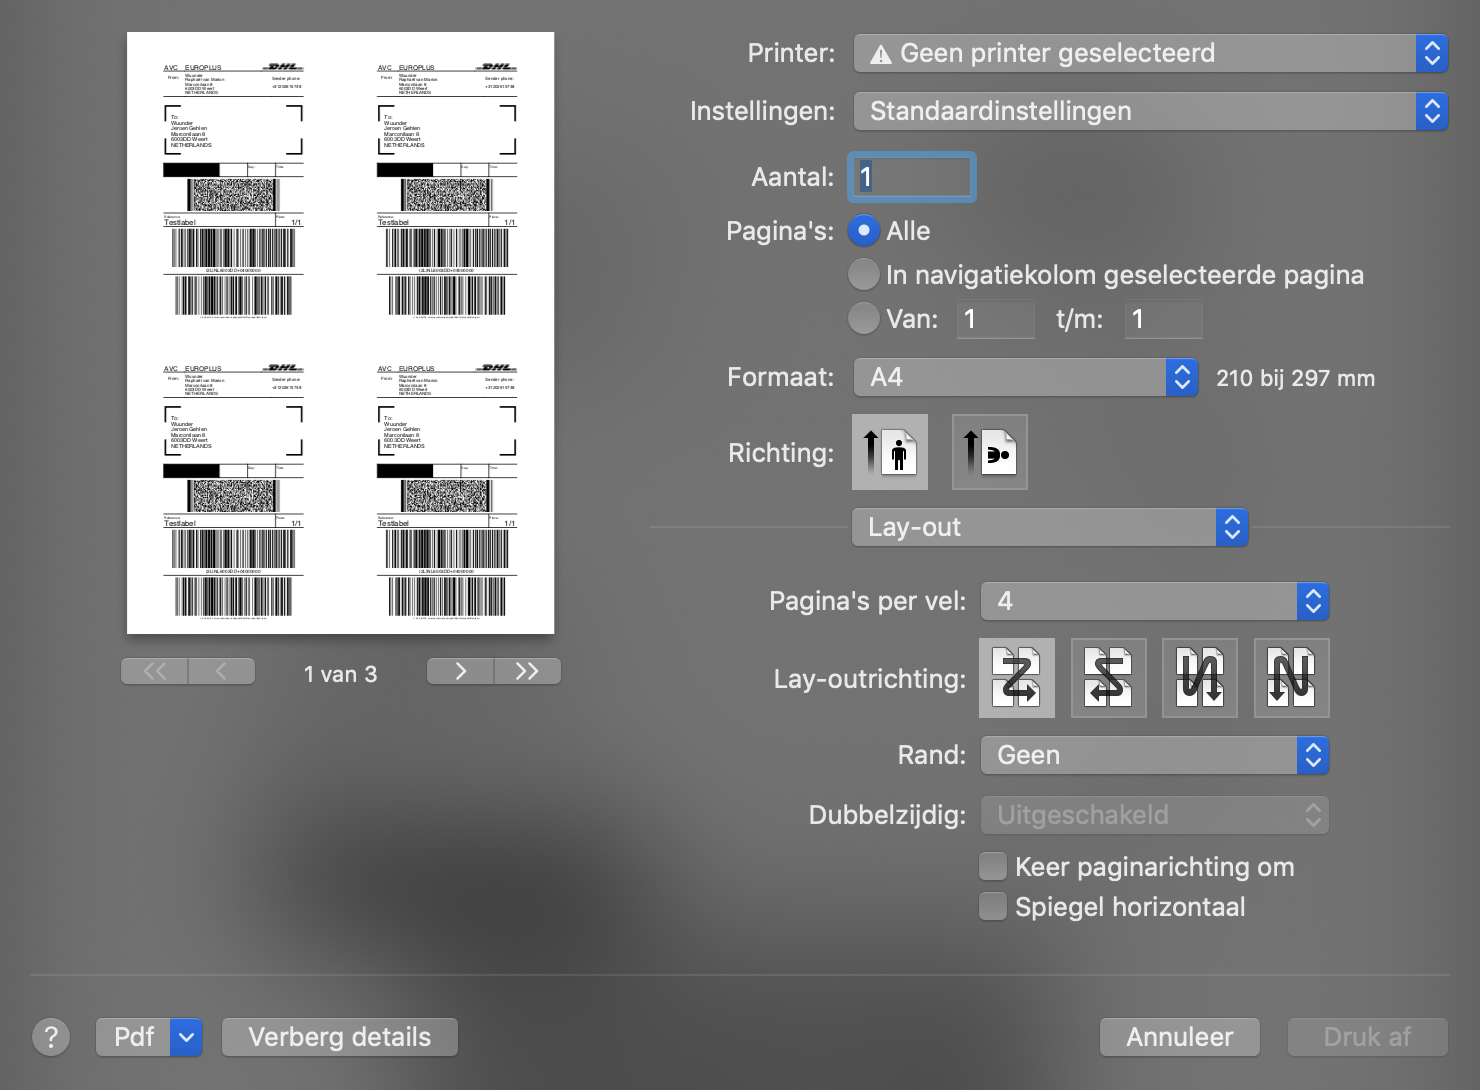
- Then choose at the dropdown menu where “Preview” stands for the option “Layout”. Then choose at “Pages per sheet” how many pages you want on one sheet (in this example, 4 pages per sheet has been chosen).
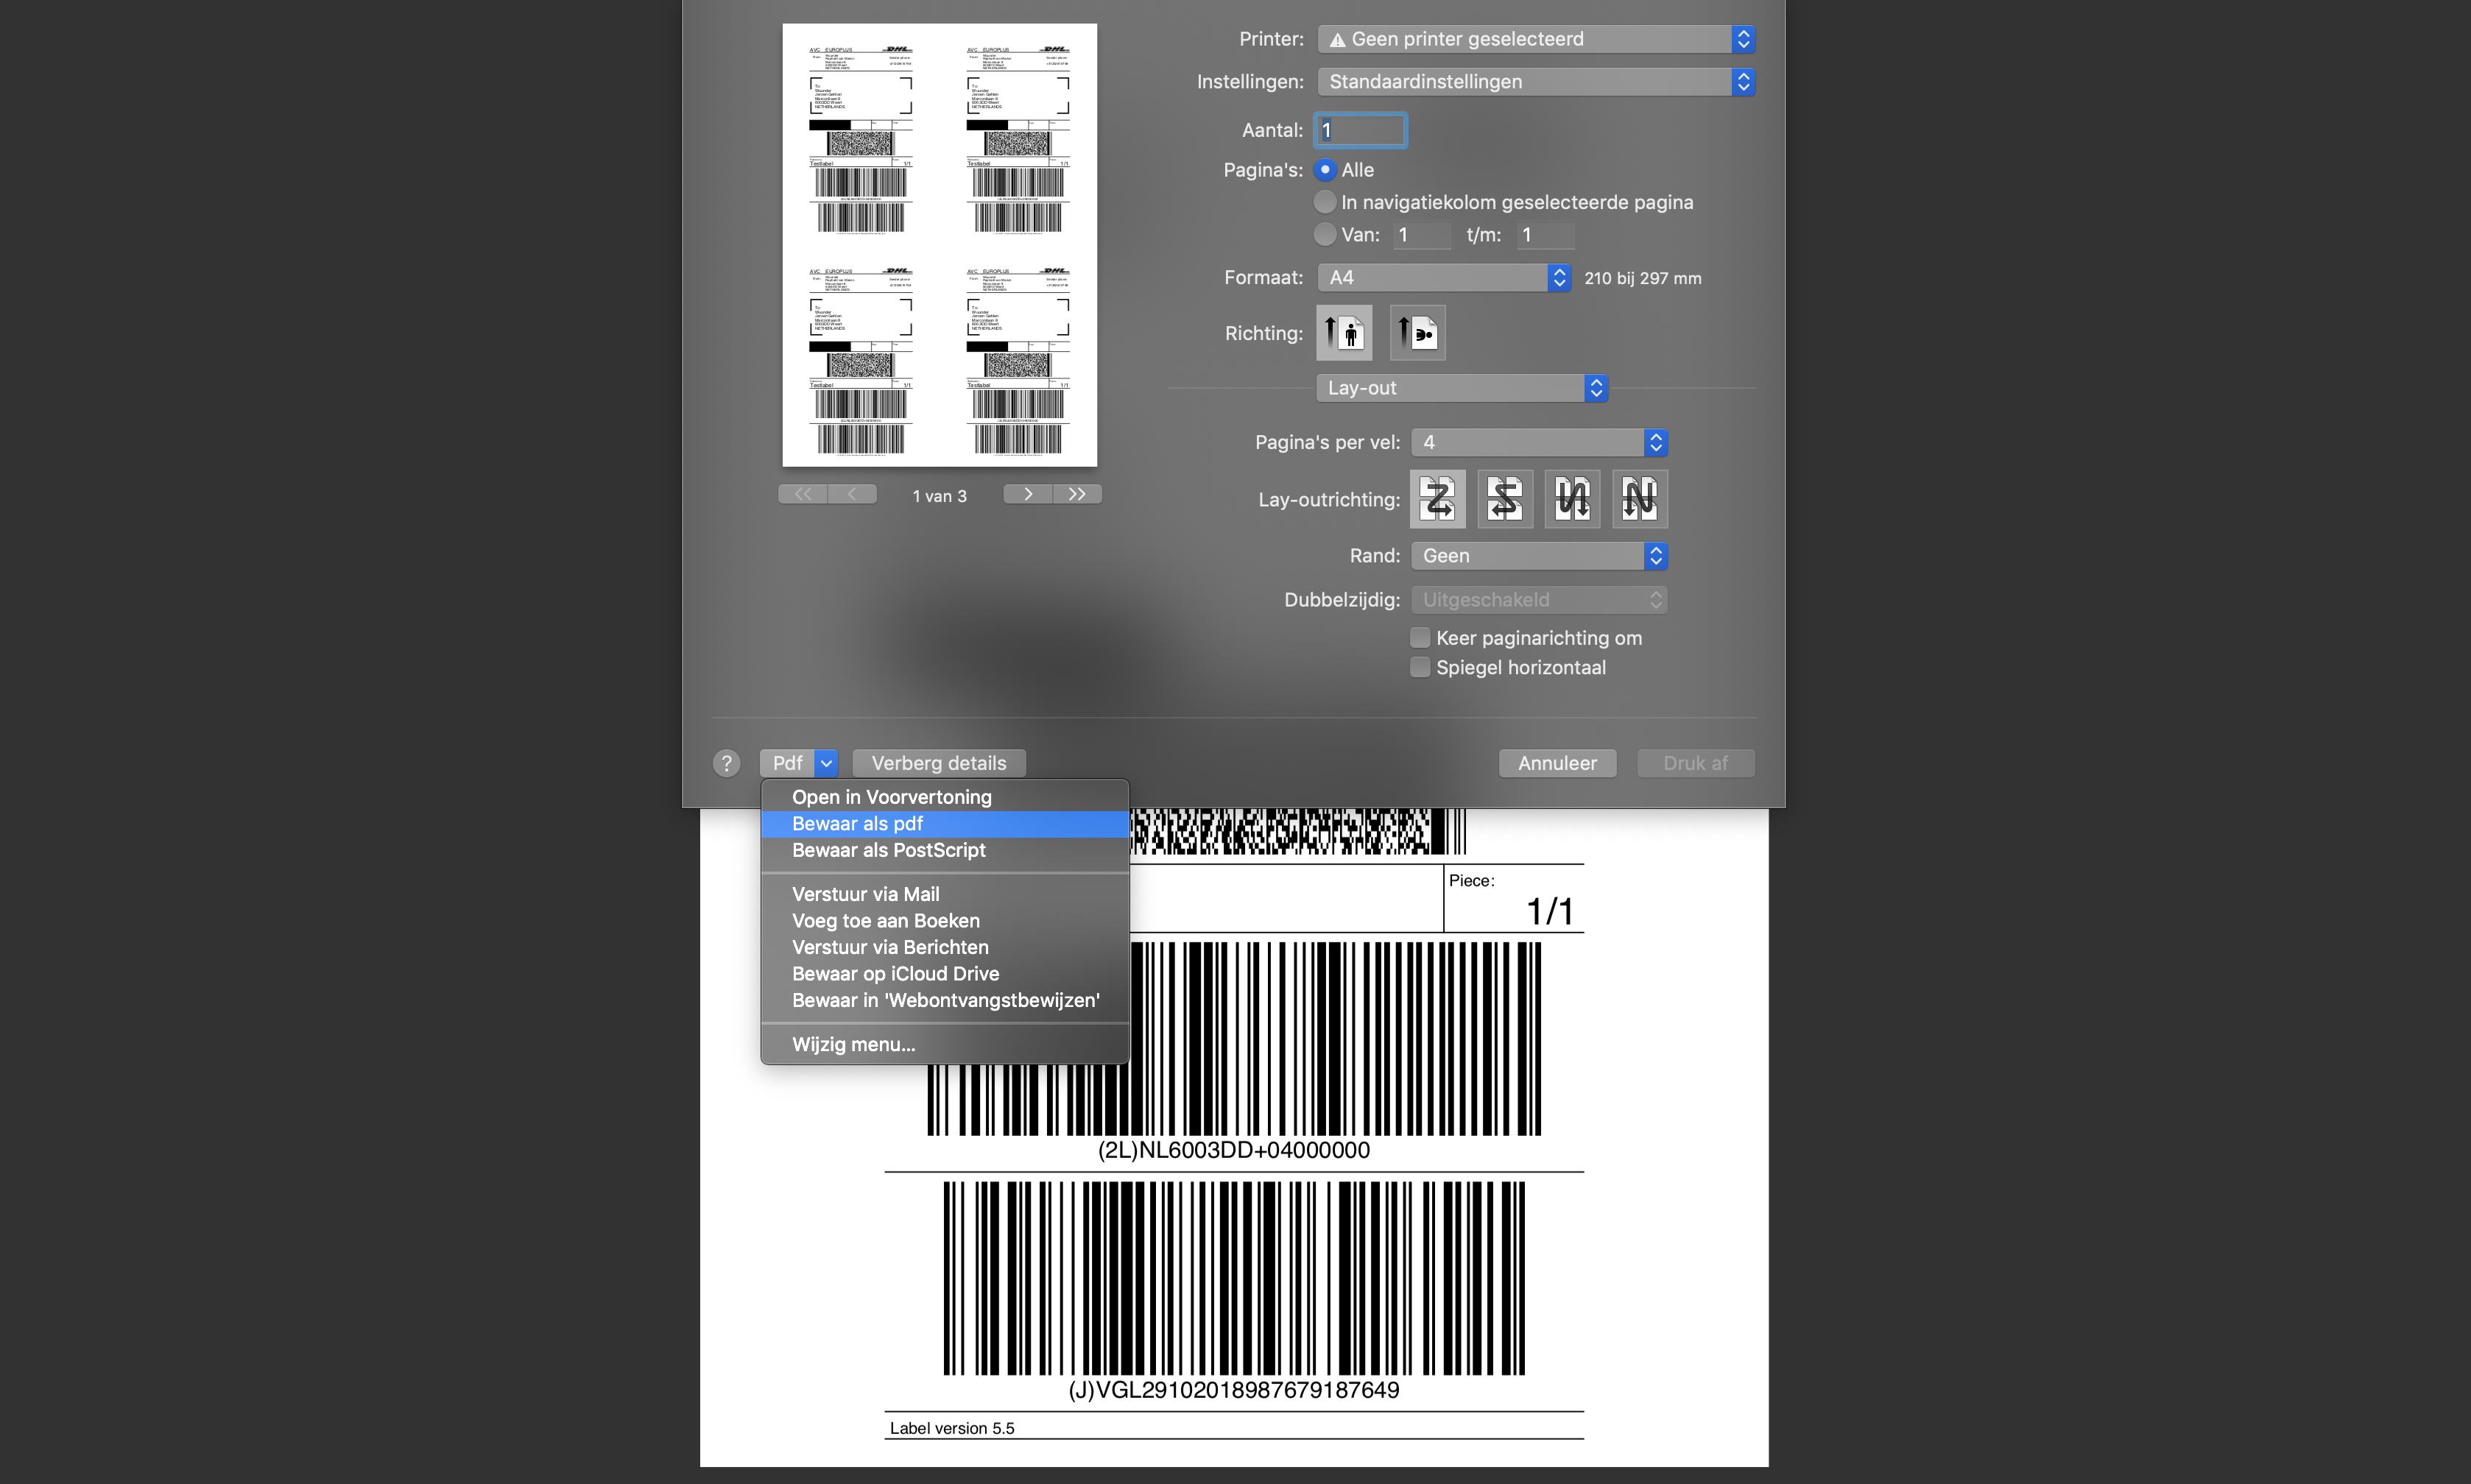
- Finally, click on “Save as PDF” at the bottom left of the window. After this you can rename the PDF file and save it somewhere.
- First open the PDF file containing all labels.
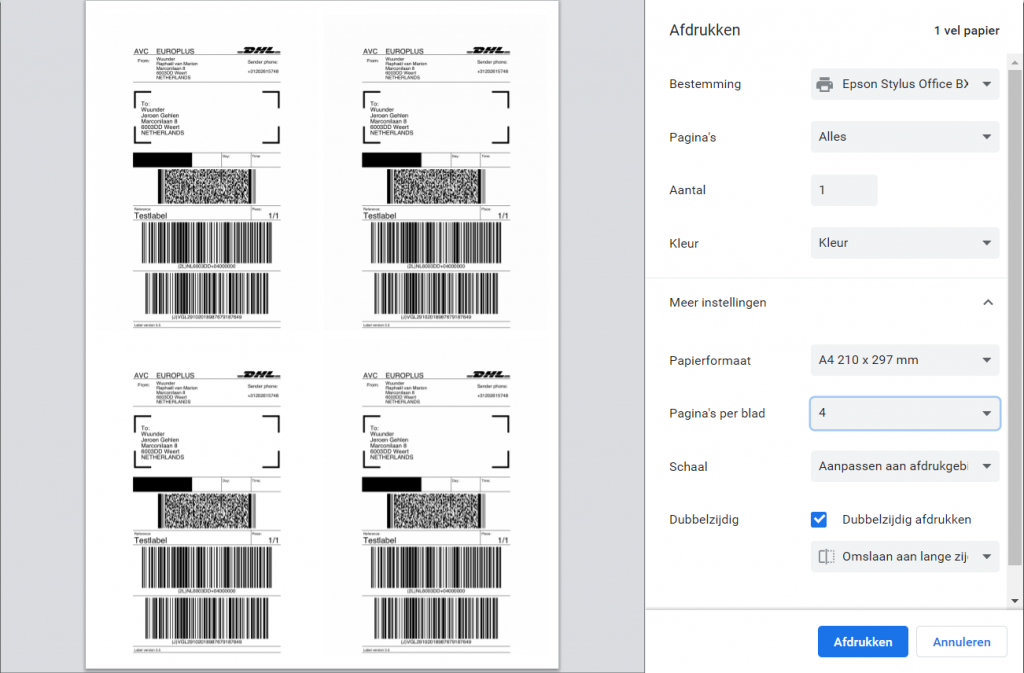
If you have A4 sticker sheets and you want to print 4 labels on it, that is quite easy.
- First open the PDF file containing all labels.
- Then press Ctrl + P to access the print overview.
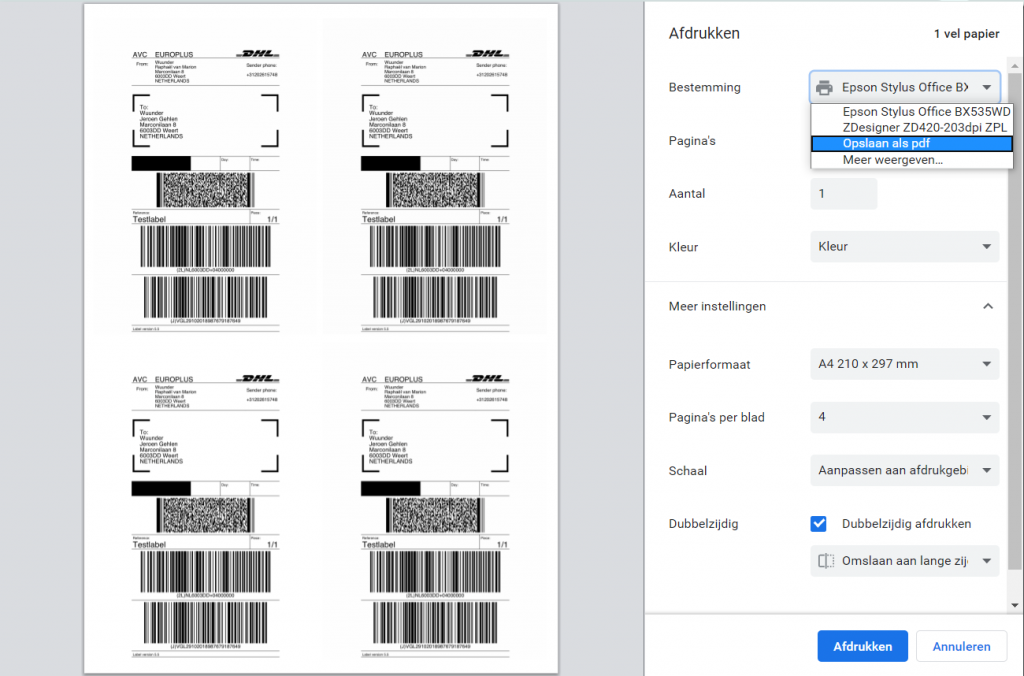
- Then choose at the dropdown menu where “More Settings”. Then choose at “Pages per sheet” how many pages you want on one sheet (in this example, 4 pages per sheet has been chosen).
- Finally, at “Destination” select “Save as PDF”. After this you can rename the PDF file and save it somewhere.
- First open the PDF file containing all labels.
