


Easily connect your WooCommerce shop
Via the following steps you can quickly get started with sending your products via WooCommerce. With the push of a button you can link your WooCommerce shop and send documents, packages and pallets with the most suitable carrier. Would you like to receive more information first? Then read through this link more about our webshop module or view the Frequently asked questions about WooCommerce.
WOOCOMMERCE SHIPPING MODULE
We make sending all packages, pallets and documents easy, personal and efficient. As an entrepreneur, you book your shipment from your mobile, tablet or computer. We help your customer or you select the best price and pick up the package wherever you want. Our team can track every shipment for you and take action towards the carrier in case of delays or other issues.
PLEASE NOTE: Wuunder has three possible solutions for processing orders:
- If you do not want to give your customers a choice between transport solutions in the check-out of your webshop, you can import the orders directly from your WooCommerce shop. You need the shipping module, but you don't have to configure it completely.
- If you want to give your customer the choice between different transport solutions in the check-out of your webshop or have it delivered directly to a parcel shop, you need a shipping module for this.
- Do you really want to surprise your customers in the check-out with options, current prices and delivery times? Then use our Dynamic Checkout† We use this to calculate real-time delivery times and the possible packaging methods of the order based on your standard packaging. We do this based on the volume of the individual items in the order. Then we show the most interesting delivery options for your customer. Interested? Please contact our customer service.
- The WooCommerce shipping module is suitable for up to version 5.4.12 of WooCommerce. Are you working with a different version or are you unable to connect? Please contact our customer service.
- Wuunder has a test and production environment, so that you can properly test the operation of your shop before going live. Sign up via this link.
- Back up your webshop and download the WooCommerce plug-in via WordPress plugins.
Woocommerce configuration
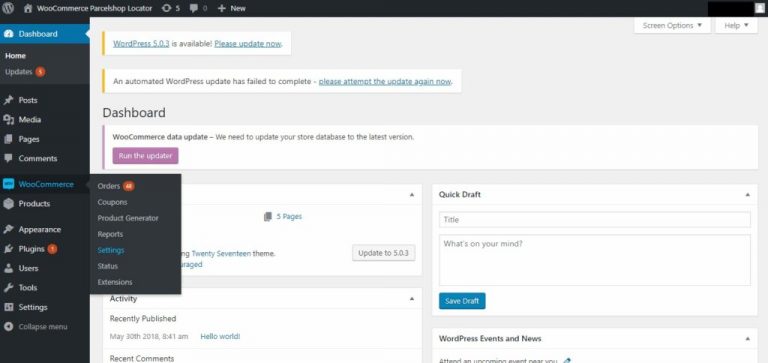
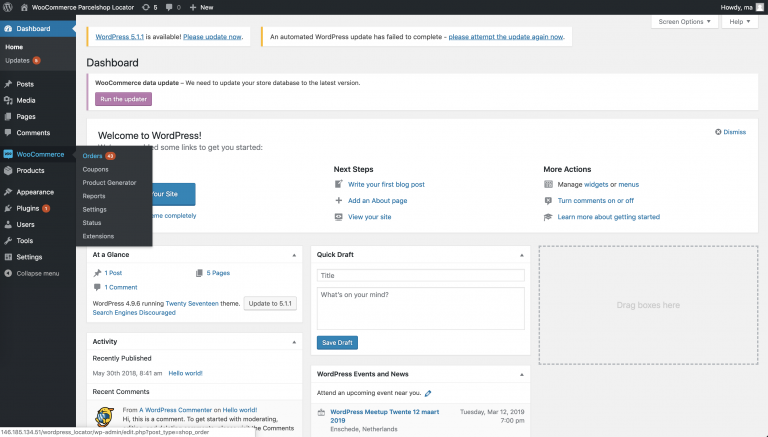
1. On your WordPress dashboard, move your mouse to “WooCommerce” and select “Settings”.
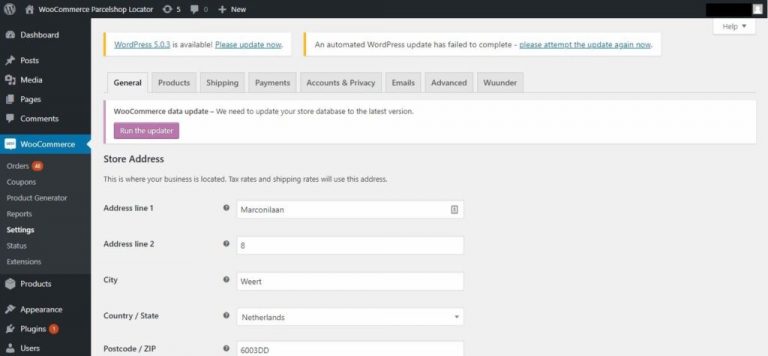
2. Then click on “Wuunder” at the top right of the screen.
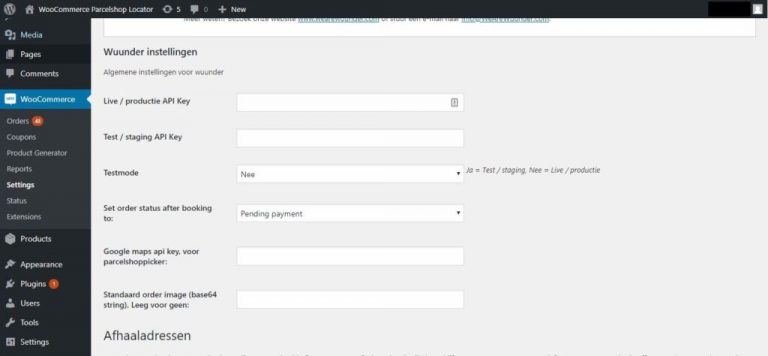
3. In the field “Live / production API Key” you enter the production API key and in the field “Test / staging API Key” you enter the staging API key you received from Wuunder. If you do not plan to test, select “No” in the “Test mode” field. read here more about the test / production environment and requesting the API keys.
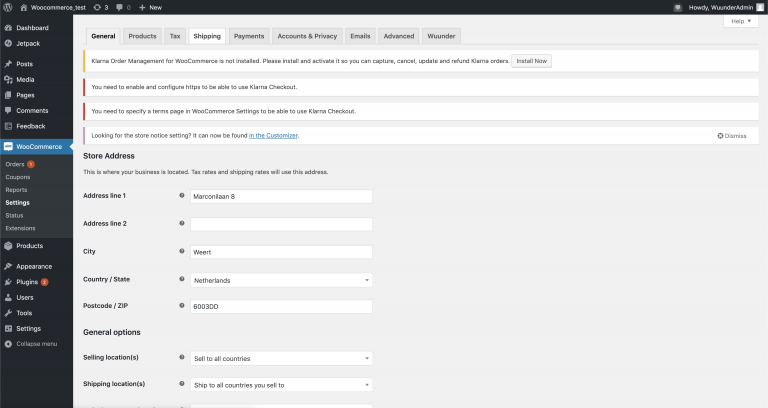
4. Then scroll down and fill in your company's details on the left.
- Provide the company name and address where the shipments are to be collected by the carrier (s). The information you enter here will be visible on the shipping label. As a result, the driver of the carrier knows where the shipments must be picked up and delivered (returns).
- The email address you use here will also receive all the labels you create. This can be, for example, the email address of the warehouse that prepares the shipments.
- Select what status you want to give to an order after creating a shipping label. In the example we choose, for example, “Pending payment”.
- After you have booked a shipment with Wuunder, we automatically update the status of your order in WooCommerce. You can determine the status after booking yourself via the drop-down menu “Set order status after booking to:”. Usually shops choose the status “Sent” etc.
5. On the right side you can apply shipping methods and filters. Your customer can then choose different transport options in the check-out. This choice is automatically passed on to Wuunder.
For example, you can create a shipping method “Free shipping”. You can of course choose the name of this transport option yourself. At filter name you specify the transport service you want to use, such as “dpd:cheapest”. We always choose the cheapest option via DPD. Do you want to know which filter names you can use, click here.

6. When all details have been entered, click on “Save changes” at the bottom of the page.
7. The plugin is now configured! Now go to your shop and test if everything is still working properly.
Please note!
Our plug-in is made on the basis of the standard check-out page of the webshop environment. As a result, when changes are made and / or a plug-in is used for the check-out, our plug-in no longer functions properly. So keep this in mind if the standard check-out page has been adjusted or a completely different one is used.
Server Configuration
If after all the steps no orders are imported, it may be that your Apache (web service) is running on your server. You can solve this by putting the following code in your .htaccess file, when you have done this the integration in MyWuunder will work and the orders can be imported. If you have no idea how to make the adjustment and you do not have a webshop builder who can do the adjustment for you, please contact our customer service.
RewriteEngine On
RewriteCond %{HTTP:Authorization} ^(.*)
RewriteRule .* - [e=HTTP_AUTHORIZATION:%1]
Have your customer send a shipment directly to a parcel shop
1. First make sure you have enabled the “Wuunder Parcelshop” under the shipping methods. Follow the practical steps below and activate the Parcelshop function in 'no time'.
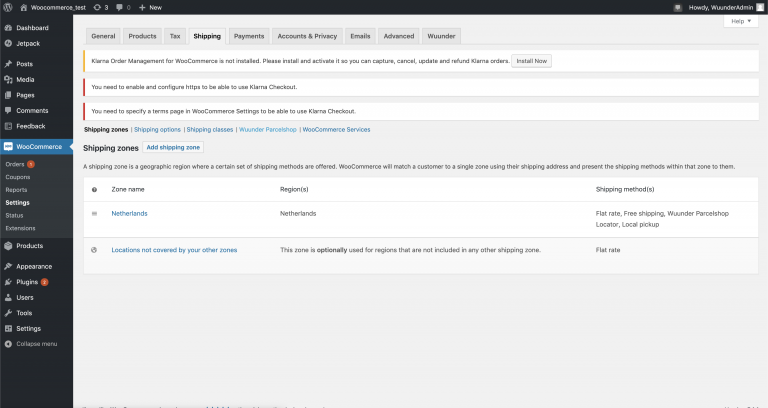
2. On your WooCommerce dashboard, hover your mouse over “WooCommerce” on the left side of the page. Then click on “Settings”.
3. Click on “Shipping” at the top left of the screen.
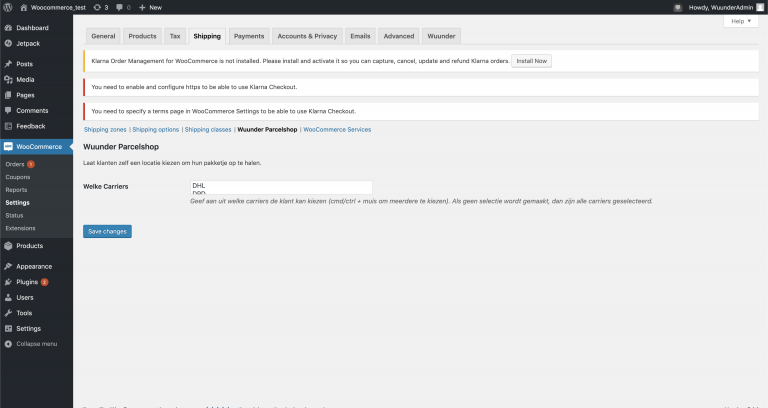
4. Then click on “Wuunder Parcelshop” in the middle of the screen.
5. Finally select which carriers you want to use from the menu by means of CMD + left mouse click (Mac) or CTRL + left mouse click (Windows).
PAY ATTENTION! If you don't select any carriers, all carriers will be turned on automatically. Then click on “Save changes”
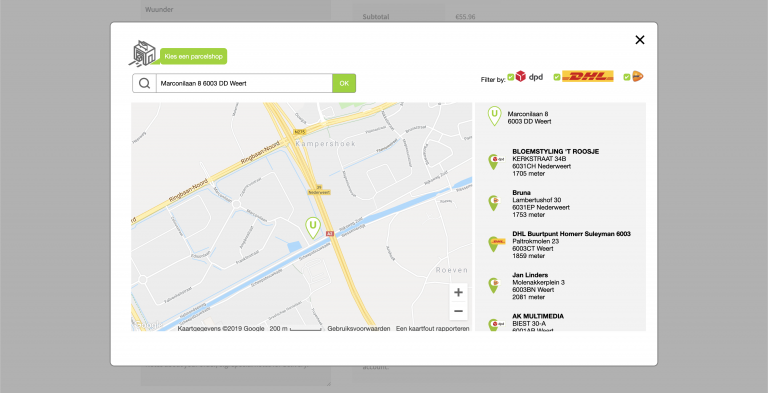
6. The parcelshop locator is now ready for use! This is what the parcelshop picker looks like in the checkout:
Send orders manually via woocommerce
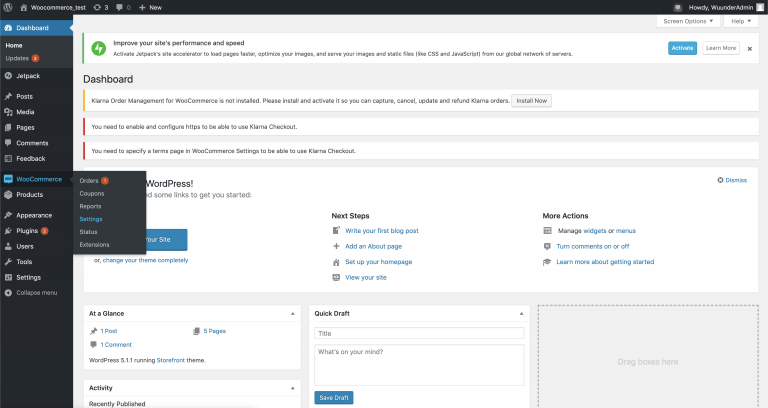
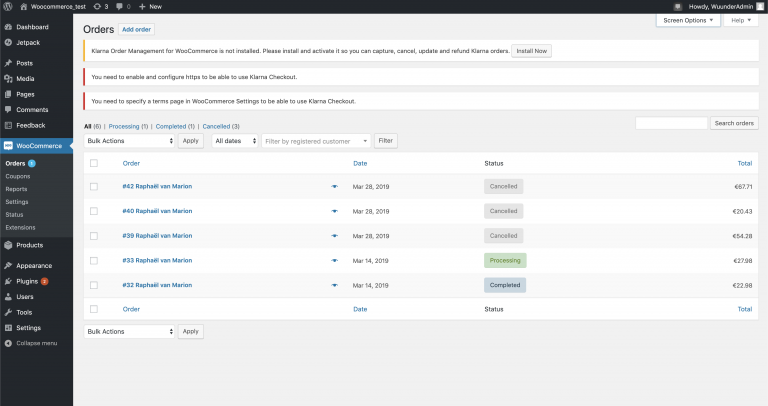
1. On your WooCommerce dashboard, hover your mouse over “WooCommerce” on the left side of the page. Then click on “Orders”.
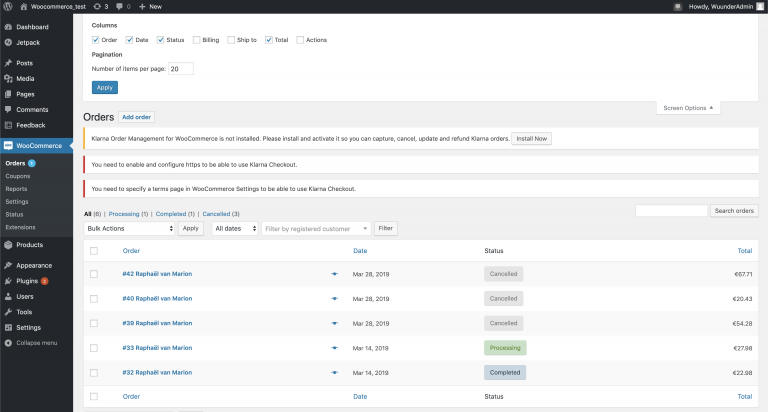
2. First make sure that the “Actions” column is turned on, you do this as follows: first click on “Screen Options” at the top right of the screen.
3. Then tick the box at “Actions” and click on “Apply”. It's that simple!
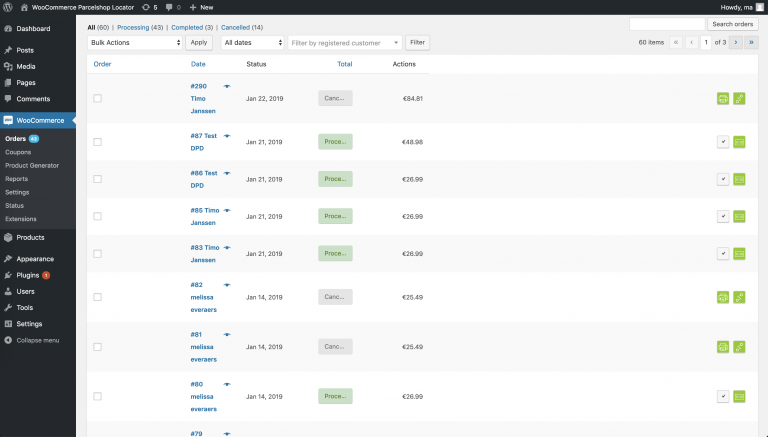
4. Click on the green icon behind an order. You can only generate shipping labels for shipments you create after installing the plug-in. Send all old orders by re-creating an order in WooCommerce or book them via MyWuunder.
5. After this, we check your submitted data and you can book the shipment. Read here More. Then you will return to the order overview of WooCommerce.
6. After you have booked an order in MyWuunder, we update the status in WooCommerce. At this moment we also update your shop with the shipment number, the track & trace URL and the name of the carrier. This also allows you to use systems such as Channable, Channel engine, justfeed of EffectConnect.
7. An overview of all booked shipments can be found in the "Book" overview. Here you can, for example, also copy the details of a booked shipment to send another shipment. An overview of all shipping labels can be found in the "To prepare" overview.
8. After this you can print the shipping label directly from your shop. Would you like more information about quickly printing your shipping labels or printing a shipping label by scanning a packing slip? Then click here.
9. By clicking on the green Track & trace icon in the order overview of WooCommerce you can also follow the shipment. In MyWuunder you can easily see the latest status of each shipment and you can quickly identify possible issues.
10. Return a shipment? That is very easy. Read more through this link.
Automated booking of many orders at the same time with woocommerce
1. You can book each order manually (see previous paragraph) or all open orders at the same time (Bulk book). For Bulk booking, go to the Settings menu of MyWuunder (green dropdown menu). Here you set a “default service”, volume and weight if this data is not received via StoreSync. read here more about these default values.
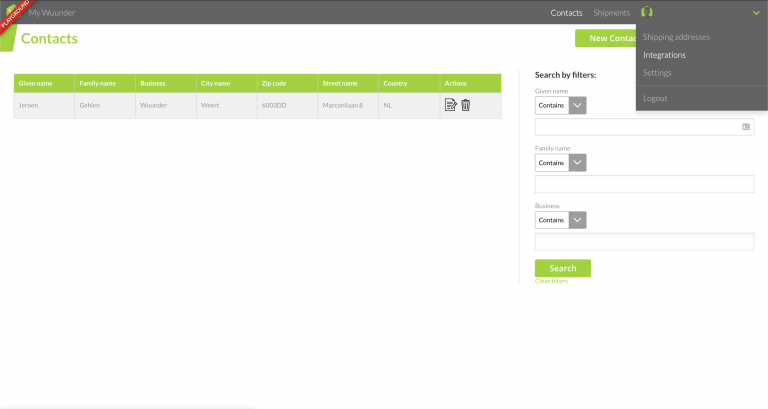
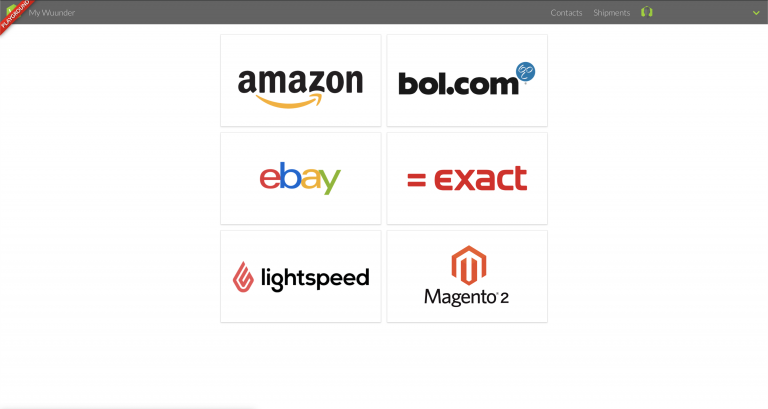
2. Then you go to it Integrations overview in the gray bar under the green drop-down menu. Select “New”.

3. Then select “WooCommerce”. You can now give the integration a name so that you later know which data you are going to import.
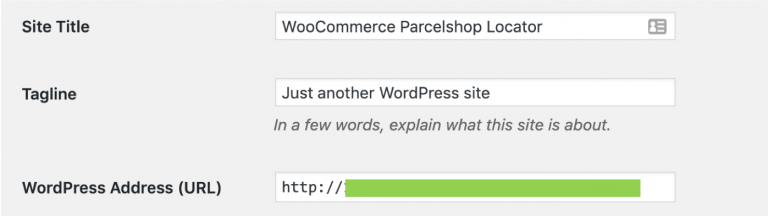
4. The base url is the URL of your WooCommerce installation you can find in the “Settings” menu of your WooCommerce shop. Copy the URL and go back to the MyWuunder Integrations page and paste the URL here.
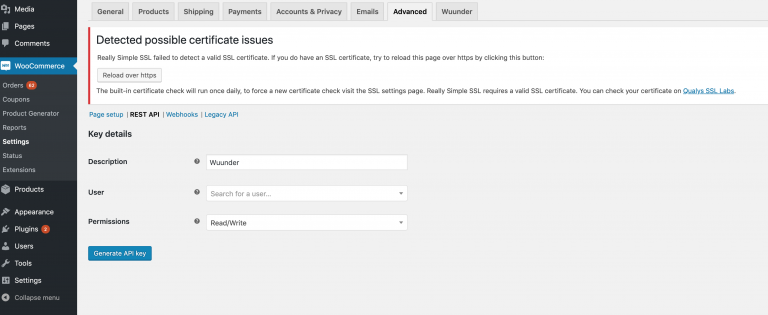
5. To find your consumer key & secret go to the WooCommerce dashboard, hover your mouse over “WooCommerce” on the left side of the page. Then click on “Settings”. Then go to “Advanced”.
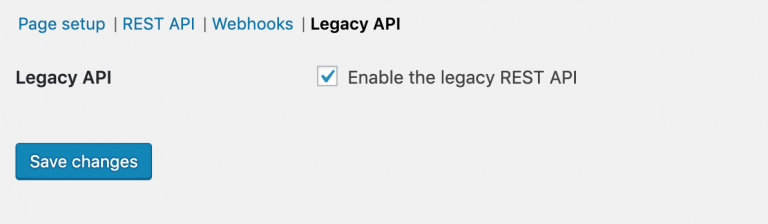
6. If you have never granted API access before, click on “Legacy API” first. Here you put a check mark in the tickbox with the text “Enable the legacy REST API”. Then choose “Save changes” to save it.
7. In the settings menu select “Rest API” and then choose “add key” to create a new API key. Give the API a description and name, such as “Wuunder”. Click on “read / write” so that we can collect your orders and adjust the status of the orders after you have booked the shipment. Then choose “Generate API key” at the bottom left.
8. You will now receive your unique Keys. Copy your “Consumer key” and “Consumer secret” and go back to the MyWuunder Integrations page to complete the integration. You can find the keys later in the overview below.

9. Now you have created the WooCommerce integration! If you want to connect multiple shops, repeat these steps until all shops are linked.
10. Then go to the top gray bar Shipments overview and select "Book". This is the place where you can book all your new shipments.
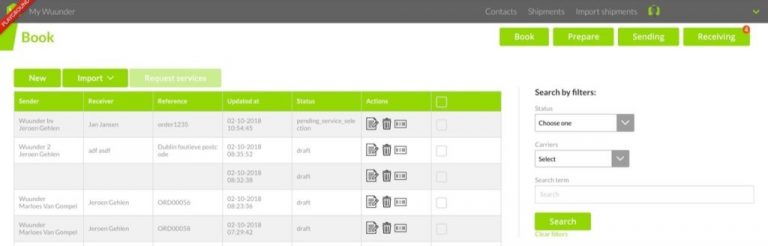
11. Select “Import” and then the desired “WooCommerce” shop.
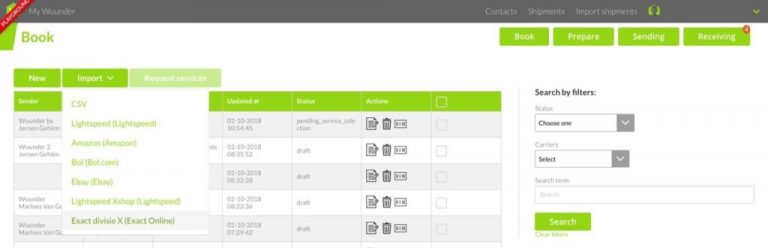
12. You now have two choices (dropdown menu in the green button):
- Import all orders as a concept: You import all orders and then book them all at once of per Unit.
- Import and book all orders automatically: You import and book all orders at once. The latter option is particularly interesting if you are using import rules en shipping rules works.

- More information about the checks we perform and possible error messages such as the lack of a collection address can be found via this one link.
- After you have booked an order in MyWuunder, we update the status in WooCommerce. This means that your order overview in your shop is always up-to-date. We also update your order details in your shop with the shipment number, the track & trace URL and the name of the carrier. This means that your order overview in your shop is always up-to-date. Systems such as Channable of Channel engine of justfeed can also use this data again.
- An overview of all booked shipments can be found in the "Book" overview. Here you can, for example, also copy the details of a booked shipment to send another shipment. An overview of all shipping labels can be found in the "To prepare" overview.
- If you want to print all shipping labels quickly, you will find here all info.
- By clicking on the green Track & trace icon in the order overview of WooCommerce you can also track the shipment. In MyWuunder you can easily see the latest status of each shipment and you can quickly identify possible issues.
- Return a shipment? This is very easy. Read more through this link.
Contents manual
Action buttons
Use the action buttons in your order overview of Woocommerce to work more efficiently. You can easily book, print and track shipments via the action buttons:
Status
Icon
More information
Books

If you click on this icon you will enter MyWuunder where you can book the shipment directly.
Booking started

Your shipment has been sent to MyWuunder via bulk books. In the draft environment of MyWuunder, the order is ready to be booked.

You can print in various ways and of course also in your shop environment itself. If you press this button, you print the shipping label associated with the order.
Follow

You can go directly to the carrier's page to track a shipment from your shop. It is even easier to track a shipment via the "Send overview" in MyWuunder.
